
What Is Pipe Lining? The New Pipe Built Inside Your Old One
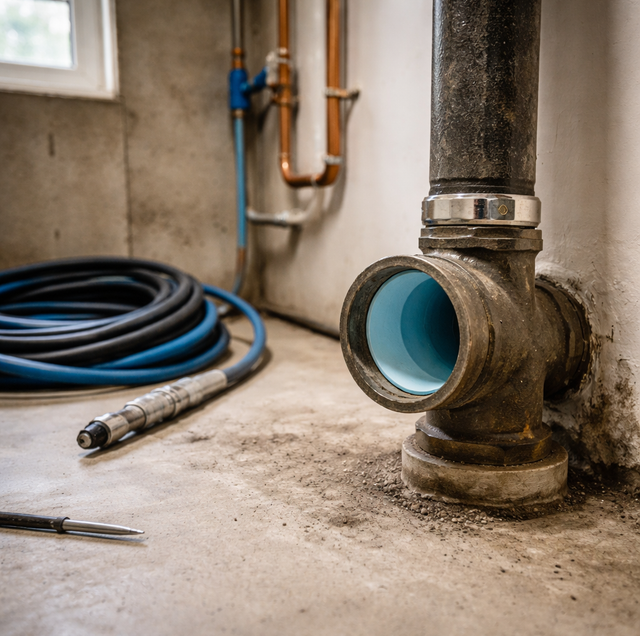
Quick Answer: Pipe lining, formally called CIPP (cured-in-place pipe), works by soaking a flexible fabric liner in epoxy resin, pulling or inverting it into the failing pipe, inflating it tight against the old walls, and then curing the resin hard. The result is a smooth new pipe formed inside the old one, installed through existing access points rather than a full-length trench.
A cracked or root-invaded sewer line used to mean one thing: a backhoe, a trench across the lawn, and a torn-up driveway. Pipe lining changed that. Instead of removing the old pipe, a crew builds a brand-new pipe inside it, and most of the yard never gets touched.
What Cured-In-Place Pipe Lining Actually Is
CIPP stands for cured-in-place pipe. The name describes the method exactly: the new pipe is not manufactured in a factory and hauled to the site. It is created and hardened right inside the pipe that is already in the ground.
The material starts as a soft felt or fiberglass tube. A crew saturates that tube with a two-part thermosetting resin, usually an epoxy or a polyester/vinyl-ester blend. While the resin is still wet and pliable, the liner goes into the host pipe through a cleanout or a small access pit. Once positioned, it is pushed firmly against the inside walls with air or water pressure and held there while the resin sets. When it hardens, you have a jointless structural liner bonded to the old pipe, typically a few millimeters thick.
A useful way to hold the idea: the old pipe becomes a mold, and the resin-soaked liner becomes the casting poured into it. The failing pipe stops carrying water and starts serving as the form that gives the new pipe its shape.
Why Lining Counts As Trenchless
The reason lining is called trenchless comes down to access. A traditional dig-and-replace job needs the pipe fully exposed, so the crew opens a trench along its entire length. Lining needs only the two ends.
Crews reach the line through existing fittings, a cleanout, a pulled toilet flange, or a single small pit at the pipe. From those points, they can send a camera, a cutter, and the liner down the full run without opening the ground above it. That is why a lawn, a mature tree's root zone, a patio, or a section of driveway can stay intact while the pipe underneath gets rebuilt. Digging is limited to the access points, not the whole path.
The Lining Process, Step By Step
Lining is professional work performed by trained crews handling curing resins and, at times, confined-space entry. Your part as a homeowner is understanding the sequence and getting a camera inspection so the right method is chosen. A typical lining job runs through the following steps.
Clean and Camera the Line: Nothing goes into a dirty pipe. The crew first clears the line of grease, scale, roots, and debris, often with a hydro-jetter, so the liner can bond to the bare pipe wall. Then a push camera runs the full length to confirm the pipe is a lining candidate and to map every branch connection.
Measure and Cut the Liner: Using the camera footage and a measuring head, the crew records the exact length and diameter of the run. The felt or fiberglass tube is cut to that measurement so the finished liner reaches wall to wall with no gaps and no wasted overlap.
Saturate the Liner with Resin: The liner is laid out and soaked, a step the trade calls wet-out. The two-part epoxy resin is mixed and worked into the fabric until it is fully impregnated, then rolled to spread it evenly and squeeze out air pockets. From this point, a clock is running, because the resin will begin to set on its own schedule.
Invert or Pull the Liner into Place: The wet liner enters the pipe one of two ways. In inversion, water or air pressure turns the tube inside out as it feeds in, so the resin side rolls outward against the pipe wall. In the pull-in-place method, the liner is winched through from the far access point and then inflated. Both leave the resin pressed against the host pipe.
Inflate the Bladder: An internal bladder or calibration tube is inflated inside the liner, pushing it tight against every inch of the old wall and holding that pressure so the liner takes the pipe's shape while it cures. Steady pressure is what keeps the new pipe round and gap-free.
Cure the Resin: Curing is what turns the soft liner rigid. Depending on the resin and the job, crews cure with ambient temperature (letting it set on its own), circulated hot water, injected steam, or an ultraviolet light train pulled through the liner. UV curing tends to be the fastest; ambient the slowest. The crew monitors it until the resin reaches full hardness.
Reinstate the Branch Connections: Curing seals the whole run, including the openings where branch lines (a kitchen or laundry tie-in, for example) join the main. A robotic cutter is sent back in, guided by the camera, to reopen each of those connections so every fixture drains again. A final camera pass confirms the finished bore.
Where Lining Fits, And Where It Does Not
Lining is not the answer for every failing pipe, and a good contractor will tell you when it is the wrong call.
Lining works best when the host pipe still holds its shape. Cracks, splits, corrosion, root intrusion at the joints, and moderate offsets are all situations a liner can bridge and seal, because there is still a pipe wall for the liner to press against and follow.
A fully collapsed pipe cannot be lined. If a section has caved in, there is no continuous path for the liner to travel or form against, so lining is off the table for that run. Severe back-pitch (a length of pipe sloped the wrong way) is another case lining cannot fix, because the liner follows the existing grade and will not correct a bad slope.
When lining is ruled out, two other trenchless-or-partial options come up. Pipe bursting pulls a bursting head through the old pipe to fracture it outward while dragging a new pipe in behind, which handles collapsed or badly deteriorated lines and can even upsize the pipe. Dig-and-replace is the fallback when the run is collapsed, misgraded, or too damaged for either method, and the crew opens a trench to lay new pipe. A camera inspection is what tells these situations apart.
The Benefits Of Lining A Pipe
The advantages of lining fall into three buckets: what stays intact, what the liner fixes, and how the new pipe performs.
- The property stays intact: Because the work runs through existing access, there is no trench across the yard, no lifted driveway, and no disturbed landscaping to rebuild afterward.
- It seals the pipe against future trouble: The jointless liner closes existing cracks and, critically, eliminates the joints where roots find their way in, so a common cause of repeat clogs is removed.
- The bore comes out smooth: The cured resin surface is slicker than aged, scaled pipe, so water and waste move through with less drag and buildup has fewer places to catch.
How Long A Lined Pipe Lasts
A properly installed CIPP liner is a long-term repair, not a patch. Manufacturers of CIPP systems generally cite a design life in the range of 50 years, and the trade commonly treats a well-installed liner as a multi-decade fix. Treat that figure as a manufacturer projection under proper conditions rather than a guarantee, because real-world life depends on the resin used, install quality, and what the line carries.
Because the liner is a bonded structural layer, it also reinforces the host pipe rather than merely coating it, which is part of why the lifespan claims run so long.
Size And Condition Limits To Know
Lining has a working range. Residential sewer laterals and building drains fall comfortably within the diameters CIPP handles, and small-diameter lining exists for branch lines as well. Beyond a certain point, though, the method has boundaries.
Very tight bends can be a limit, because the liner has to negotiate the turn without wrinkling; sharp offsets and multiple close elbows make some runs poor candidates. The pipe also has to be clean and structurally continuous first, which circles back to why the cleaning and camera steps are not optional. If those conditions are not met, the crew moves to bursting or replacement instead.
Frequently Asked Questions
Usually yes, though you will lose use of drains connected to the lined line for the working window, often a single day. The crew will ask you to avoid running water while the liner is curing so nothing enters the pipe before the resin hardens.
Slightly. A cured liner adds a wall of roughly 3 to 6 millimeters, so a 4-inch line loses a small fraction of its diameter. In practice, the smoother cured surface offsets much of that, and flow capacity usually holds or improves because the old pipe was already narrowed by scale and roots.
CIPP for potable water uses specially certified liners and resins, and it is a separate product line from sewer lining. The sanitary sewer lining most homeowners ask about never contacts drinking water, since it is installed in the waste line, not the supply.
A lined pipe is cleaned like any other, with a cable machine or hydro-jetting, and the cured surface actually tolerates jetting well. One caution: aggressive mechanical cutters should be used carefully so the liner is not gouged, which is why a camera-guided approach is preferred.
It is a year-round repair. Cold ground can lengthen an ambient or hot-water cure, and hot weather can shorten the resin's working time, so crews adjust the cure method and mixing pace to the conditions rather than waiting for a particular season.
Yes, and this is one of its strengths. Roots enter through joints and cracks, and the liner bridges the entire run as one jointless piece, so it removes the openings roots exploit. The existing roots must be cut out during the cleaning step first, before the liner goes in.
Schedule a camera inspection before you assume the worst — see exactly what your sewer line needs. Clog Squad serves Holland, Grand Rapids, and Grand Haven. Call (616) 779-7675.
